How To Paint A Color-Blocked Wall
A little paint, a little planning, and a free afternoon are all it takes to turn a plain wall into a focal point! Here are our foolproof tips.

This site contains affiliate links to products. We may receive commission for purchases made through these links. Price at time of publish date may change.
Plan Your Layout
- For an eye-pleasing look, use the rule of thirds: Imagine a grid overlay dividing the wall equally in thirds vertically and horizontally. Place the color transitions or areas of interest along the lines or intersections: two-thirds from the bottom for a more modern look, or one-third from the bottom for a more traditional chair rail height.
- For multiple blocks, colors, or angles, first sketch out your design on paper and plan your color placement with swatches. Or take a picture of your target wall(s) and use the image-editing tools on your phone to “draw” your pattern.
- Feeling ambitious? Think beyond one wall! Your color block can wrap around a corner or even transition onto the ceiling or incorporate a door and trim.
Prep & Paint
- To mark straight lines, use a four-foot level and a pencil, a laser level, or even an old-school chalk line, which can be handy for angles.
- It’s usually easier to paint the lighter color first and then follow up with the darker color. It’s possible to add a light accent on a darker wall, but you may need a few coats for full coverage.
- If you’re doing multiple color blocks, paint two coats in sections that aren’t adjacent to each other; remove the tape and let those sections dry for 24 hours. Then tape off and paint the section in between. Or use the thin tape lines between the sections as part of your design.
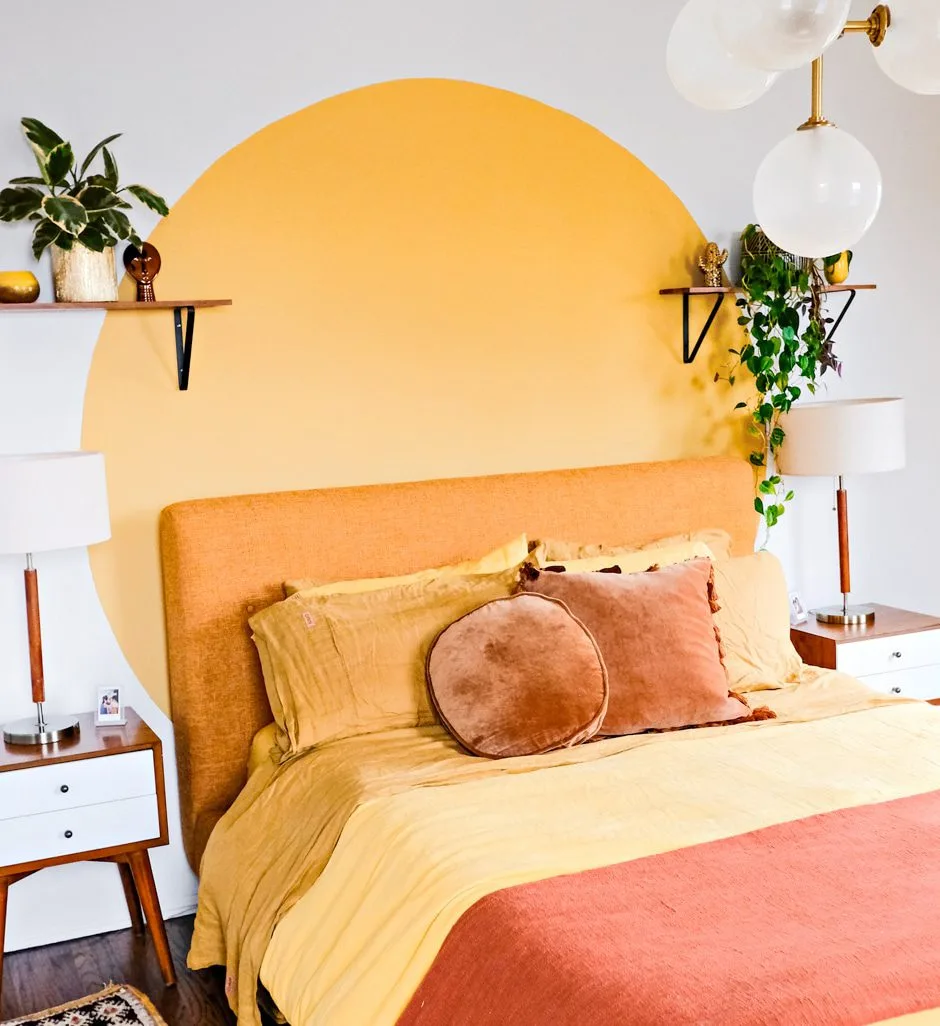
- To make an arch, tie a pushpin to one end of a string the length of the radius of the arch, and tie a pencil to the other end. Insert the pin into the wall, then lightly trace the arch, starting at the tallest point and working your way down both sides.
Get Crisp Lines
- Select the best tape for the job. We love ScotchBlue Ultra Sharp Lines Painter’s Tape or FrogTape Multi- Surface Painter’s Tape.
- When applying the tape, press down as you go with your hand and then follow up by firmly pressing down with a putty knife or credit card to help secure it in place.
- A trick for preventing bleed: After taping off your color-block section with painter’s tape, use a brush to paint onto the edge of the tape in your original base color and let it dry before applying the secondary paint color. This process “seals” the edge of your tape, so any bleed that might occur is in the base color and therefore unnoticeable.
- Slowly remove tape at a 45-degree angle while the last coat of paint is still wet to avoid chipping.

Painting Supplies List
- paint roller: Choose based on wall texture.
- paint: A quart should be plenty for an accent. Choose sheen based on surface.
- putty knife or credit card
By Drew + Jonathan | Feature photograph by Emily Shur | Drew + Jonathan photograph by Dani Nagel/@dazeyden


