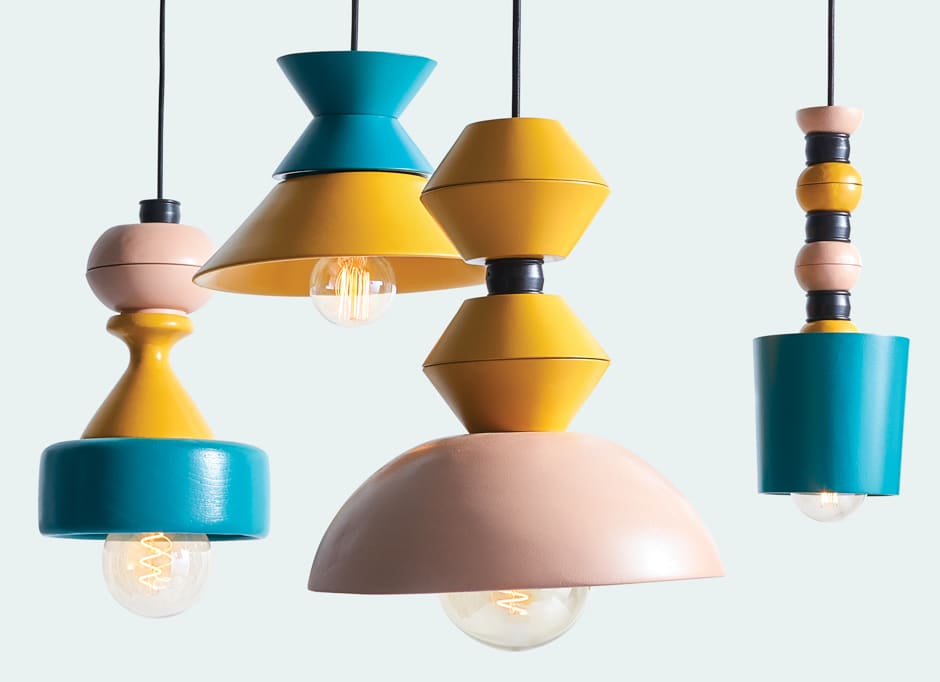
Hit Refresh: Pendant Lights
Hit the thrift shop for serving bowls and napkin rings, and with some clever DIYing and a few coats of paint, you’ve got a cool statement light.
1. Collect Your Materials
Scour your local secondhand store for tableware. Wood works best as it’s relatively lightweight and takes paint well, which will help with your light’s longevity. Look for bowls and napkin rings in all shapes and sizes, keeping in mind the size of the room you’ll be hanging your light in. Also look for matching pairs of bowls that can be hung rim to rim to create a bead-like decoration on top of the drum.
2. Stack ‘Em Up
Now it’s time to get creative! Play around with your collected pieces until you zero in on an arrangement. Your largest bowl will be the main drum, and you can stack the other pieces over it to get a feel for what you like best. Go as simple or as elaborate as you want. Once you have a configuration you’re happy with, take a picture to remember the order. Next, drill a hole through the bottom of each bowl, making sure they’re large enough to feed a cord through.
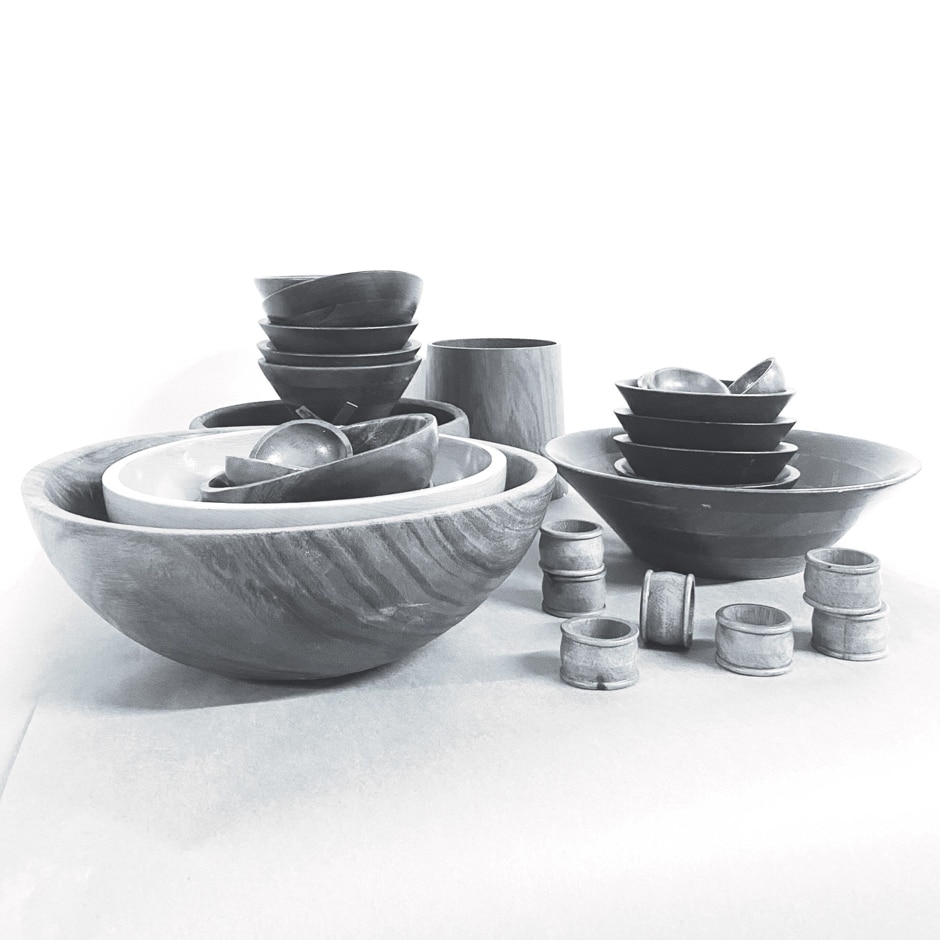
Before
To create the pendant lights here, we used a collection of large and medium serving bowls, smaller salad and dipping bowls, and a few napkin rings.
3. Prep & Paint
Lightly sand and prime each of your pieces, then restack them and assign paint colors to each section. For a more subtle look, paint all pieces the same shade. For something more statement-making, pick out a few complementary colors (the way we did here) and create a pattern.
4. Hang Time
To install your new lighting, you’ll need a pendant light kit (a cord with a socket on one end and a plug on the other), a light bulb, and an electrical plug that matches the type in your pendant kit (all of which can be found at Lowe’s).
Once your painted pieces have dried, cut the attached plug off the cord so that it fits through the holes (and, yes, this is safe). Once they’re strung, attach the new plug to the cut end of the cord, following the instructions on the new plug’s package (they should be easy to follow, even if you’ve never dealt with electrical projects).
Then apply a thin line of E6000 glue, a rubber-based waterproof adhesive, to the rims of the bowls that touch, as well as in between each of the other pieces.
Last, install a swag hook (they sometimes come with pendant kits) to your ceiling, hang your cord, screw in your bulb, and voilà! Your masterpiece is complete.
By Hannah Baker | Photograph by Carson Downing | Before photograph and DIY design by Jeni Wright