A Happier Hutch
Simple flips can turn an old hutch into an eye-catching statement piece.
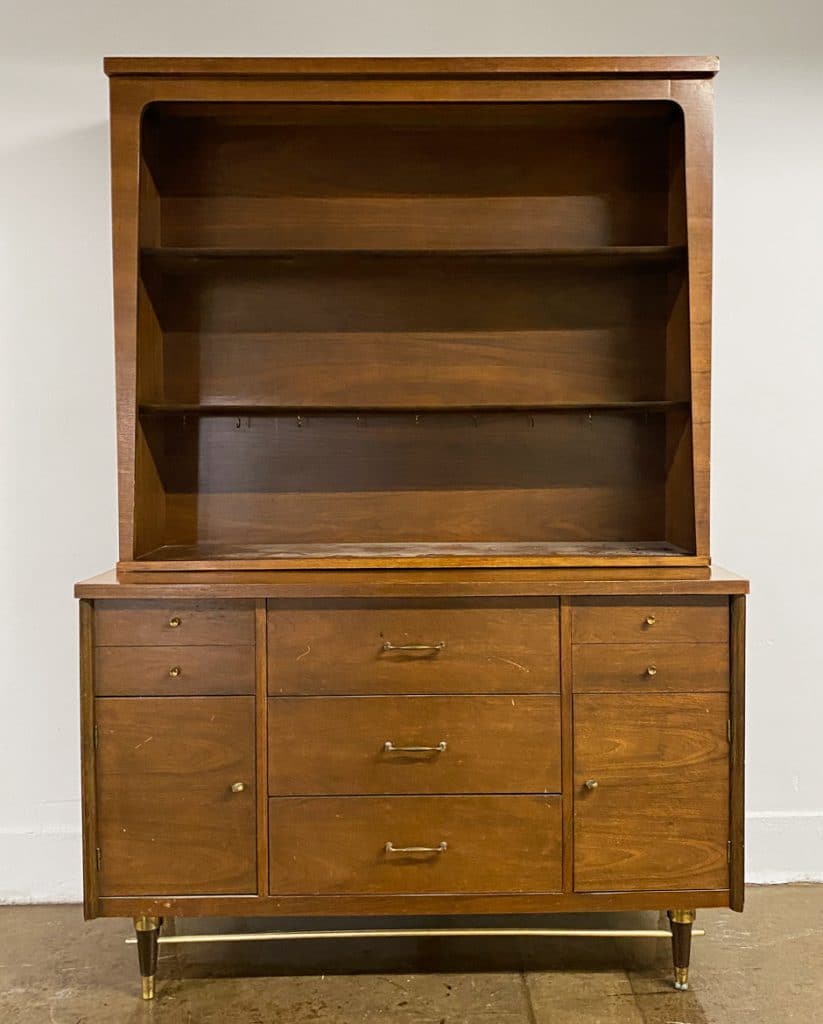
Disassemble
To start, remove all loose shelves, hardware, and drawers. Detach the top of your hutch from the bottom (if possible) and take off the backing. Basically, anything that can come off should, as it will make it easier to prep and paint.
Get Even
Use spackle to create an even surface for painting, filling in any extra hardware holes as well as imperfections (like scratches or dents) in your piece. When the spackle dries, use fine- or medium-grit sandpaper to sand those spots down so they’re flush with the wood.
Back It Up
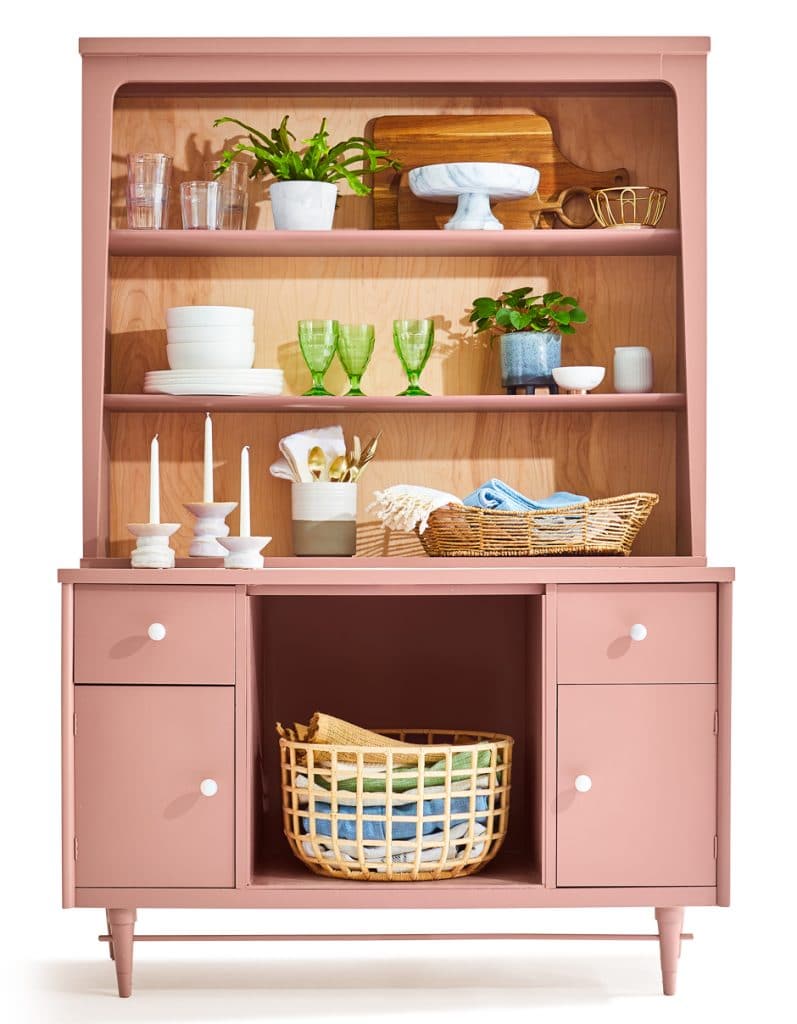
Pairing a lighter wood with the poppy pink paint (we like Sherwin-Williams’ Hopeful) ups the sophistication of this piece. Using your original backboard as a pattern, transfer the measurements onto a 1/4-inch plywood board (we used birch) and cut it down to size.
Next, coat the plywood with a matte polyurethane to seal it and let dry while you sand, prime, and paint the rest of your hutch.
Put It All Together
Once everything’s dry, it’s time to reassemble. Reinstall shelves, doors, and drawers, and attach your new backboard using pin nails or staples. Drill any new hardware holes you need, and install your new pulls and knobs.
Love Your Shelf
Now comes the fun part: styling your hutch! Use the open shelving to put your prettiest platters and plates on display; bring in baskets for an unfussy solution to storing table linens and adding texture to your shelves.
A plant or two will make any shelf look good, and a favorite knickknack or small piece of art helps to round out your newly styled hutch.
By Hannah Baker | Hutch photograph by Carson Downing | Before photo and DIY Design by Jeni Wright